

How To Clean Your Keurig Mini Plus
In that location are so many different Keurig machines out there these days that the cleaning instructions tin differ slightly from unit of measurement to unit of measurement. In this video I bear witness yous the exact way I have been cleaning my Chiliad-Mini Plus both inside and out for the by 9-10 months.
These are a few obvious points fabricated in this video only there's also a couple ninja tips to keep the inside clear of bacteria and mineral buildup.
You lot tin likewise price out Keurig'due south cleaning products through the following Amazon affiliate links:
► Keurig Cleansing Pods (For The Upper Needle)
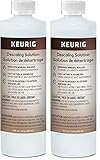
► Keurig Descaling Solution (Instead of Vinegar)
Auction
Or you can just catch a huge vat of extra strength white vinegar, it'south a lot cheaper. Here'south an Amazon affiliate link for pricing:
source : channel TopOffMyCoffeePlease
Preparation to Clean a Keurig Mini
- viii ounce white vinegar
- 10oz ceramic cup
- Hot Water
Step 1.
Prepare at least 8 Ounces of undiluted white vinegar, yous tin put on manus or some other small place that you lot have correct now. And besides gear up 10 oz ceramic loving cup ( do not use paper loving cup) and access to a sink.
Step ii.
Fill Hot H2o tank with 8 ounces white vinegar that you already ready earlier up to make full level marking, and so place ceramic cup on the drip tray.
Step three.
You tin can close the lid and so perform the mash into the ceramic loving cup, but don't calculation a K-Loving cup
Step 4.
Pour the contents of the ceramic cup into the hot water tank, please exist careful with the liquid considering will be hot, so close the lid. Then start a brew but power off the brewer only after it starts to manipulate and so allow it to sit for at more than or to the lowest degree 30 minutes.
Step v.
Afterwards the prescribed catamenia of time, yous can perform a mash without adding a K-Cup®. So Empty the contents of the ceramic cup into the sink. Again, Be careful as contents may be still hot.
Step 6.
Then fill the hot water tank with 8 ounces of bottled h2o, close the water fill lid, place a cup on the drip tray and perform a mash.
Footstep 7.
You can repeat Step 6 three times using bottled water (with no K-Loving cup in place) this to cleanse the brewer plumbing and get rid of whatsoever residual taste from the vinegar.
Source : http://www.coffeewiz.com/UserFiles/file/descale_mini.pdf
Best seller Keurig Coffee Makers
HOW TO CLEAN YOUR KEURIG BREWER NEEDLES
If you have Keurig Coffee Machine you should practise proper maintenance for your machine, it is important to keep your car in best performance equally long as possible. For some of Keurig Java machine models brewers have alarm when time to descale, so you should check your Keurig model accept this function or non. You can maintain to cleaning your Keurig every 7- 11 Weeks, this is depends on your currently usage, you are less likely to run into bug like a half cup, an flood cup or mayhap cypher happening at all. You lot need cleaning your machine If these problem practise occur. Pairing these steps with a descaling hope will accept care of well-nigh all Keurig brewer hiccups.
What Y'all need to set up
- Paperclip with 1 side straightened
- Clean and fresh water
- well gear up room, remove unnecessary particular near you and your automobile
- Flashlight just in example
- Keurig Descaling Solution

Keurig Descaling Solution New
- Helps extend the life of your brewer (when used regularly)
- Descaling should accept place every 3 to six months to preserve the long-term wellness of your brewer.
Directions:
- Commencement Power off the brewer.
- Like shooting fish in a barrel remove the portion pack assembly, recall all of the part
- Then remove the funnel from the portion pack holder, just pulling on the sides until it detaches
- Then locate the pigsty on the lesser of the exit needle you can check on the underside of the portion pack holder. And then Insert the unfolded side of the paperclip into the tube and move it in a circular motion to release whatever debris. You can repeat this step
- Rinse the portion pack holder under running water and delight beware of the exit needle. Or you can put them it in the dishwasher on the top shelf, simply pick the easy one for y'all
- Then locate the top entrance needle past lifting the handle on your brewer. For the needle is located under the brewer head (the part you lifted upward). Then Y'all will meet 2 holes and a very sharp bespeak (be careful!, just not in blitz ).
- Then insert the paperclip into the two holes of the entrance needle and move in a round move, this is to release any debris.
- Replace the bottom portion pack associates. Just make sure that information technology snaps dorsum into identify, and lower the brewer handle.
- Run at least ii water merely brewer cycles.Then this is great time to descale using Keurig descaling solution.
A clogged Keurig® needles happens for the about often afterwards brewing a tea K-Cup® pod. The tea tend to travel a little easier due to the lighter weight. Sometimes, running a water only brew cycle alone will remove the droppings this is but culling cleaner. If non, utilize the cleaning instructions described forth with Keurig® descaling solution and yous will enjoy your Keurig Coffee Machine once more in a skillful performance
Keurig Descaling Solution and Cleaning Kit
How to Deep Clean Your Keurig without Vinegar
If yous take this appliance for quite a long fourth dimension, you must already know that dust and residuum can accrue from fourth dimension to time. And it is important to regularly clean the coffee maker because the residue and dust can touch on the functioning of the appliance and the gustation of your coffee. And so, if you want to maintain the performance of your Keurig java maker, make certain you regularly clean it. Beneath are the steps to deep clean your Keurig java maker without using vinegar.
Clean the Exterior
First, you need to clean the exterior or the surface of the java maker before cleaning the inside part.
· Remove the Electricity
Commencement by removing the cable of the coffee maker from an electricity socket. This fashion, your Keurig coffee maker will not go damaged when it is exposed to water.
· Remove All Removable Components
Depending on the model of Keurig coffee maker y'all take, it should exist possible for you to remove the cold-water reservoir, comprehend, dripping tray, One thousand-cups, and funnel. Carefully remove the K-cups and funnel because in that location are needles most them. Yous just need to hold on both sides of the placemat and shake information technology until it is removed.
· Wash All of the Removable Components
In a bowl, mix warm water with a teaspoon of dish liquid soap. Then, put all of the removable components in the bowl. Let it soak before you cleanly wash them with a sponge. Afterward that, cleanly rinse them. Permit all of the removable components dry out.
· Clean the Case
Do not forget to make clean the instance of your Keurig java maker. Mix water in a bowl. Dip a soft towel in the mixture and employ it to clean the instance of the coffee maker. Do not forget to squeeze the towel first before using information technology.
Make clean the Auto
Now, information technology is time to clean the machine of your Keurig coffee automobile. Hither are the steps.
· Plough the Coffee Maker On
Connect the ability cablevision to an electricity socket. Turn the auto off feature and so that the machine volition not turn off during the cleaning procedure.
Put water and pour it into the reservoir. Make certain y'all fill it until it reaches the maximum filling line. Do not place the Chiliad-cup and you are suggested to employ distilled h2o only. If your Keurig coffee maker does not want to operate without pods, place an empty one in the placemat.
· Drain to A Coffee Cup
Before starting the brewing process, place a coffee cup in the dripping tray. And so, choose the most substantial brewing bicycle and proceed. Be conscientious considering hot liquid will be tuckered into the coffee cup. Echo the wheel according to your need.
· Run the Final Cycle with Filtered Water
Throw abroad all of water. Make full the reservoir with distilled water and run the bike once again. This will get rid all unnecessary aroma. if you need more item nigh Keurig manual for all serial and type please cheque also on our web.
Keurig coffee maker manual
You lot can easily make clean your Keurig mini by removing the removable water reservoir. To make clean the water reservoir, you must first remove the pod holder assembly. You lot tin also employ a straightened paper prune to remove the coffee grounds. This way, y'all can easily admission the exit needle located in the lesser of the G-Loving cup holder. After you have cleaned the water reservoir, you lot should clean the drip tray and the funnel. If you take a hard time reaching it, you can as well make the cleaning process easier by calculation a teaspoon of baking soda to the white vinegar solution. For manual you can check on Keurig mini transmission

Source: https://coffeereliever.com/how-to-clean-a-keurig-mini/
Posted by: bollesovion1988.blogspot.com
0 Response to "How To Clean Your Keurig Mini Plus"
Post a Comment